
How the Predictive Thermometer works (1st Gen)
-

Instant Read Mode
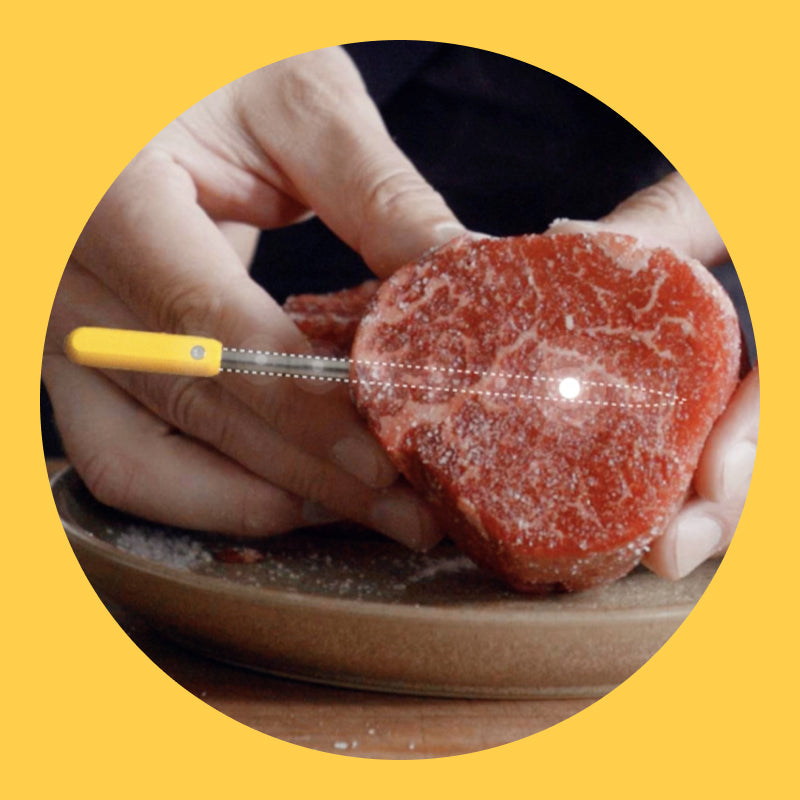
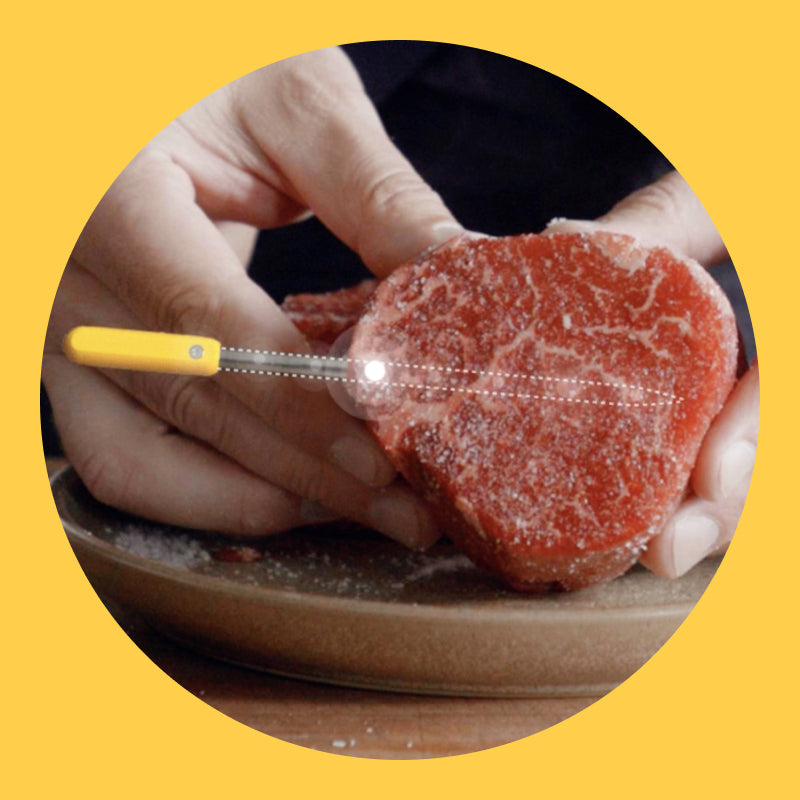
The Predictive Thermometer wakes up in Instant Read mode. Wake it up by removing it from the charger or Booster.
You’ll know the thermometer is awake when the Display or Combustion App starts displaying temps. It takes less than a second.
It takes 3-4 seconds to accurately report the “instant read” temperature at the pointy end.
Instant read turns off when you set a target temp on the Display or app (Predictive Cooking Mode).
The instant read temperature is not necessarily the same as the “core” temp. Core temp is determined after you set a target temp. Look below to learn more about TrueCore®.
-

Predictive Cooking (with Display)
Insert the Predictive Thermometer to at least the min line.
Press m- and s+ buttons to set the “cooking to” temperature.
Press “start” – the "cooking to" temp will stop blinking.
Apply heat (oven, smoker, grill, frying pan, etc… you get the idea).
The Display shows progress by indicating % of cooking completed.
At about 33% a countdown will appear: “ready in.” That’s the prediction!
The "core" temp displayed is the TrueCore® temp – the lowest of the internal sensors.
When that number hits 00:00, an alarm will sound to let you know your food is ready.
Enjoy!


Cooking Guides
View all
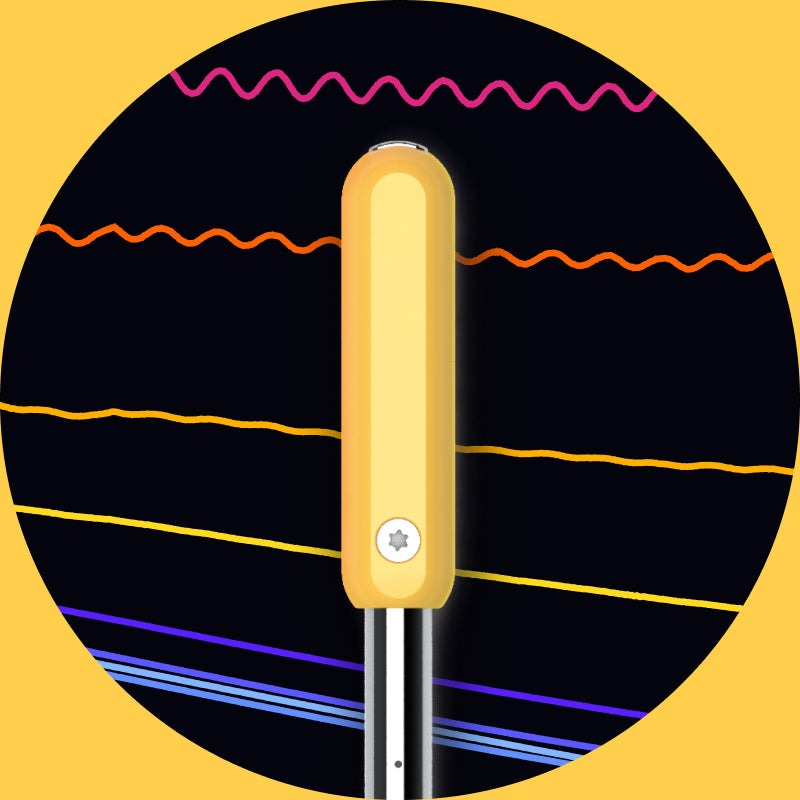
8 sensors give you Total Temperature Awareness®
Having “extra” sensors allows the Combustion Predictive Thermometer to do things that other thermometers can’t, including finding the actual lowest internal temperature - even if your insertion is off the mark.
TrueCore® detection - prevents undercooking
By comparing temps, the Predictive Thermometer finds the TrueCore® temp, which is the coolest part of the food.
That's the accurate internal temp. Even if your probe is off center, or if the food is small (filet) or asymmetric (like a chicken or fish) -- the Predictive Thermometer still finds it!
Surface temp - the real cooking temperature
Water evaporating from the surface of food cools the food a lot, and surface is the temperature the food actually feels as it cooks.
The internal temp can never get hotter than the surface (until it’s cooling).
Press the temp button on the display to toggle temps (TrueCore® – TrueSurface® – TrueAmbient®).

Ambient temp - your oven is lying
The ambient temp will be lower than your oven (or smoker) is set to, sometimes by 100 degrees or more. Don’t panic! This is normal. The temp near the surface of your food is much cooler.
Relatively cool (212ºF) steam coming from the food mixes with the hot surrounding air, and the TrueAmbient™ temp reflects that.
A roast creates its own weather!
All the important stuff is calculated inside the thermometer itself
With other “smart” thermometers, the important data are stored and critical calculations are done remotely - on your phone or in the cloud. The Predictive Thermometer does everything onboard!
If the connection ever gets interrupted, all the "missing" data appears on reconnect.
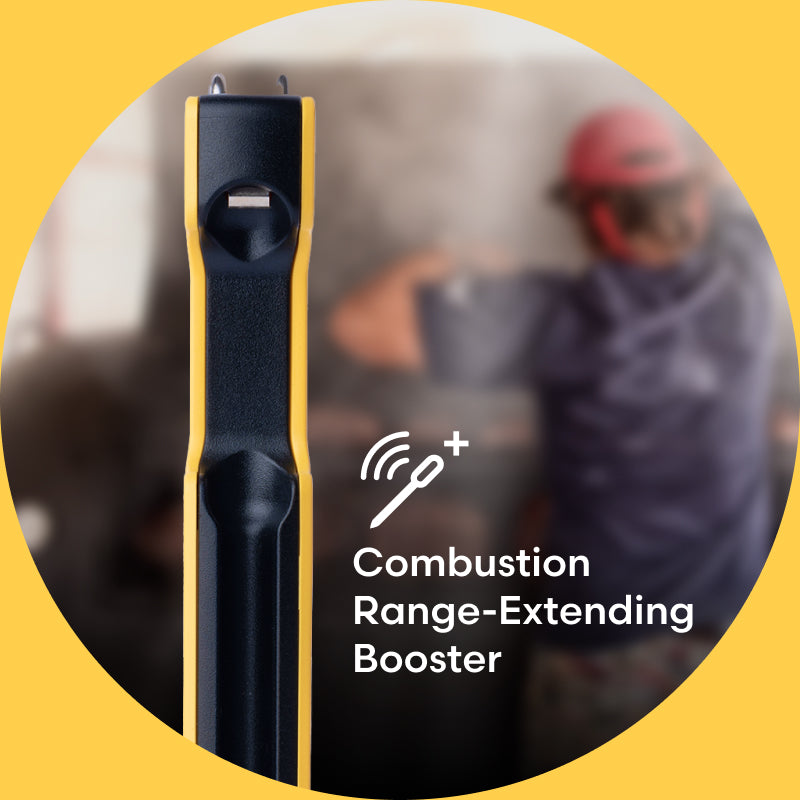
Use MeatNet™ tools to extend wireless range
Cooking set-ups are full of radio obstacles. Use a range-extender - the Booster or Display - near your smoker/grill to catch and boost the weakened signal.
Each MeatNet™ tool adds up to 330ft (100m) of unobstructed signal strength.
For best signal, keep a clear line-of-sight between linked tools.
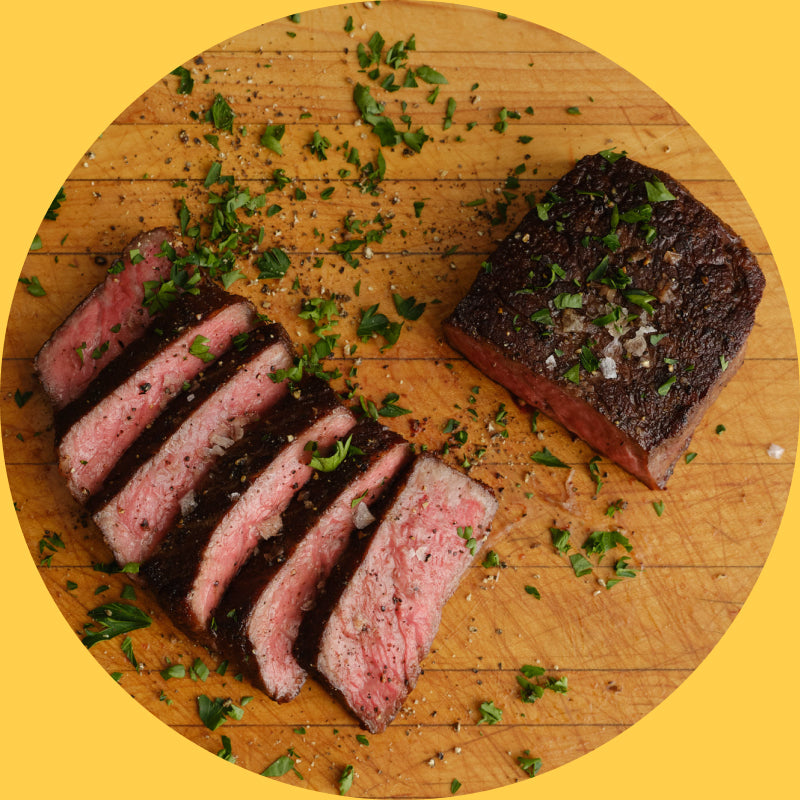
Resting your meat
Carryover (resting) is not part of the prediction. The only real advantage to resting meat is that it's easier to carve.
Slice steaks/filets/smaller foods immediately to minimize carryover.
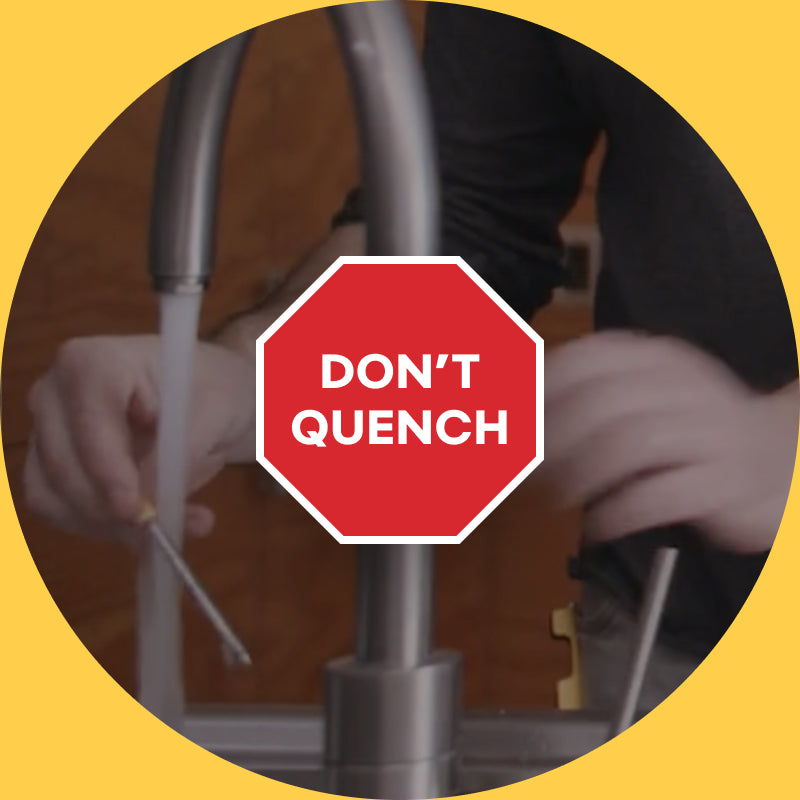
Don’t be afraid to scrub
The ceramic handle is very strong and scratch resistant. Use steel wool or abrasive cleansers (e.g. Barkeeper’s Friend) to make the yellow handle shiny and new again.
Use a non-abrasive scrubby on the steel probe.
Don’t “quench” a hot thermometer - wait for it to cool before soaking.