Setup Guide: Range-Extending Display
-
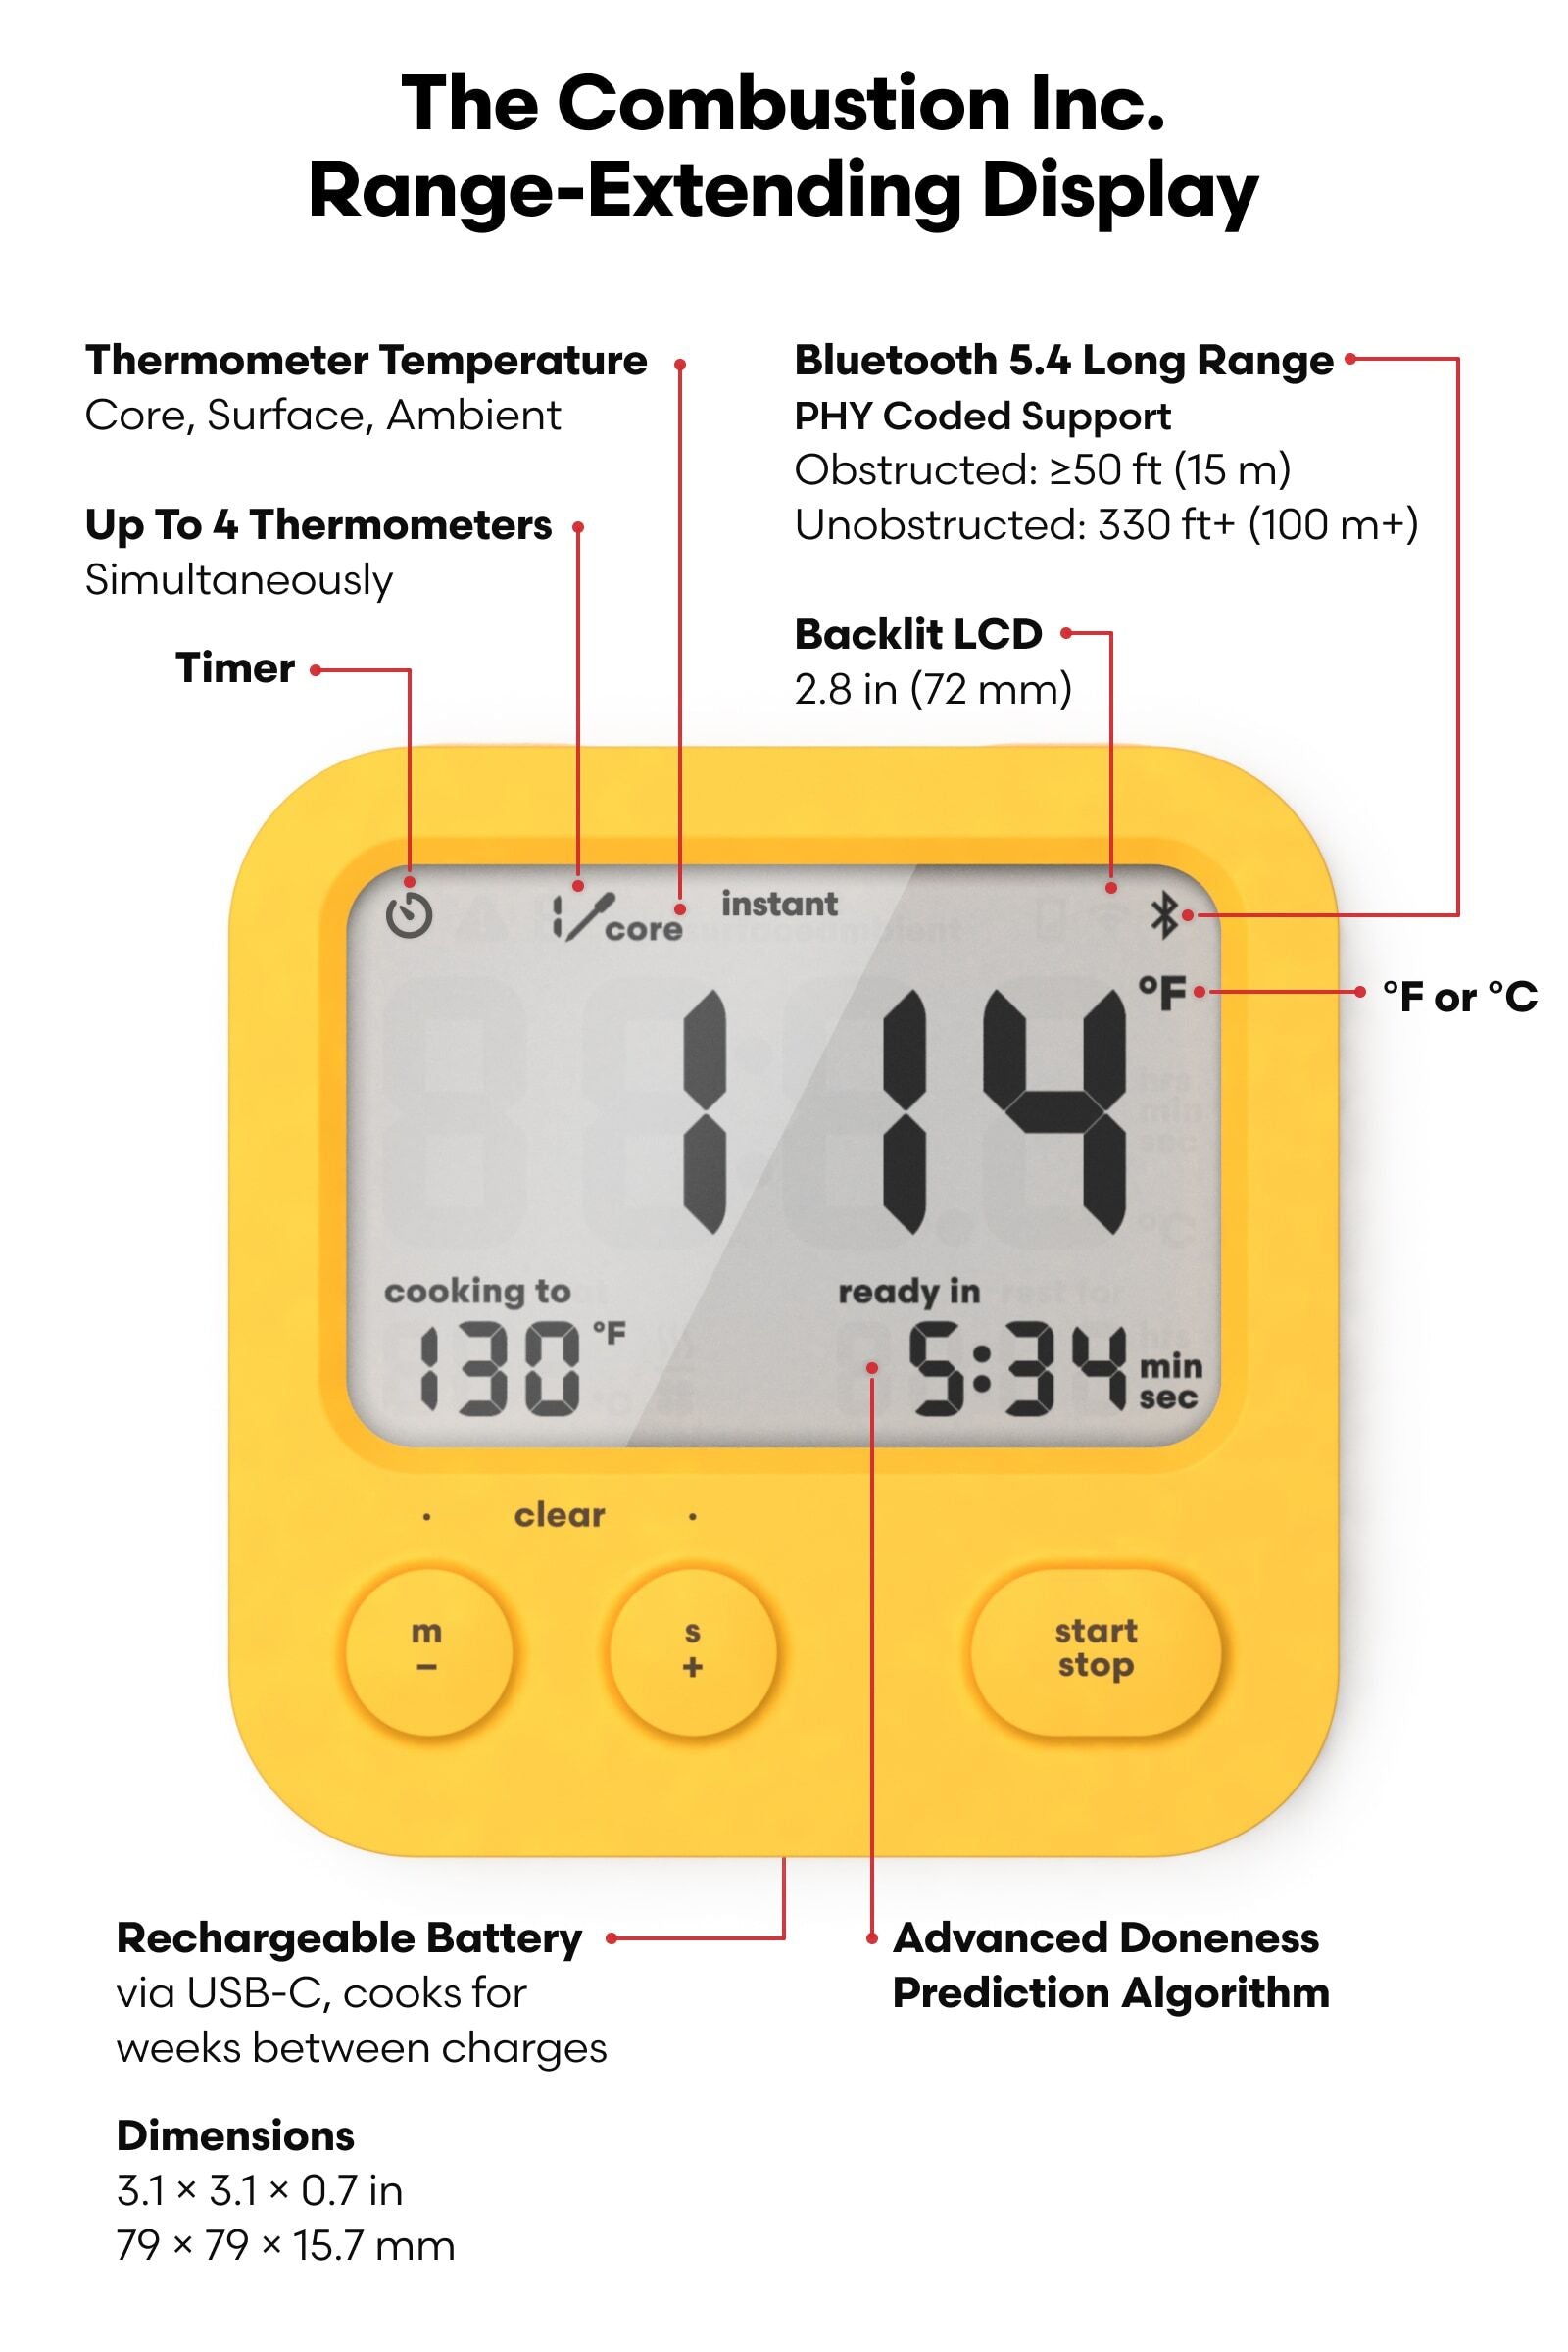
Meet the Combustion Display.
It keeps your phone safe from sauce, droppage, and buttery fingerprints. Its bold, easy-to-read screen shows core, surface, and ambient temps.
Set your target temp and the Display counts down the time to perfect doneness. It also acts as a repeater, so you can use the app from another room, possibly while recumbent.
The Combustion Display can manage up to 4 Combustion Predictive Thermometers at once. And it’s ruggedly cute. So they say.
Before you start cooking, get your Display set up properly and ready to rumble.
-
Do this first!
-
Charge your tools
Charge the Display (90 min).
The low battery indicator will flash until the Display is fully charged.
NOTE: use standard 5v USB ports/power supplies only.
-
Update firmware
- Download the "Combustion Inc" app from the App Store for iOS or Google Play for Android.
- Open the settings menu inside the app by tapping the Combustion logo
then tap "update.” - Recharge your Display after the update (10 min).
Note: please do not update more than one Display (or other Combustion tool) at the same time. Leave the other ones powered off (or in standby) while you update. It doesn't take long!
-
Link Display
- Turn on the Display by pressing the Start/Stop button
- Turn on Predictive Thermometer by removing it from the charger
- Place thermometer next to the display for a few seconds
- When a temperature appears on-screen, that means they’re linked
- With multiple Predictive Thermometers, repeat these steps
- Each Display can be linked to up to 4 Predictive Thermometers
To Link Booster(s) to Display + Predictive Thermometer(multinode MeatNet™) follow steps in the Booster set-up guide
-
Connect to WiFi (optional - 2nd Gen Display)
If you have the (2nd Gen) WiFi Display then you'll want to follow the steps on the WiFi start page to get it connected to your local network.
The WiFi Display acts as a gateway, connecting any Predictive Thermometer (or Gauge) to local WiFi. With that you can send temperatures and other thermometer data to the cloud - and stream it to your phone or tablet (and some Mac computers).